
To make bronze in RuneScape: Dragonwilds, mine equal amounts of Copper Ore and Tin Ore in the Fractured Plains, then smelt them at a Furnace. One complete batch consumes 3 Copper Ore and 3 Tin Ore and produces 2 Bronze Bars. You need access to a Furnace, enough protection to gather ore in a dangerous region, and inventory space for both ores.
Do not spend your first trip searching for a normal Bronze Ore node. Bronze is an alloy produced from copper and tin. After you collect the finished bars into your inventory, you unlock several important crafting stations, but those stations still have to be built with their own materials.
RuneScape Dragonwilds Bronze at a Glance
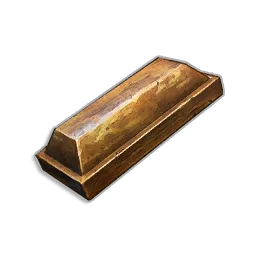
The finished Bronze Bar used for bronze-era crafting.
| Requirement or result | Current value |
|---|---|
| Processing station | Furnace |
| Copper per batch | 3 Copper Ore |
| Tin per batch | 3 Tin Ore |
| Bronze per batch | 2 Bronze Bars |
| Bronze Bar weight | 4.5 |
| Bronze Bar stack limit | 99 |
| Main ore region | Fractured Plains |
| Normal ore-gathering tool | Bone Pickaxe |
| Bars sold by shops | None |
The most important number is the 1:1 ore ratio. The game consumes the same quantity of copper and tin even if one resource appears more abundant during a particular mining run. Track the smaller total in your inventory: 18 Copper Ore and 9 Tin Ore still support only three complete batches, producing 6 Bronze Bars and leaving the extra copper unused.
Because each batch makes two bars, bronze targets should be planned in pairs. If an item costs 5 bars, for example, you still need three smelting batches. Those batches produce 6 bars from 9 copper and 9 tin, leaving one bar available for another recipe.
Prepare Before the Mining Trip
Bronze is an early metal upgrade, but its ores are not gathered in the safest starting terrain. The supplied routes place both Copper Ore and Tin Ore in the Fractured Plains, where stronger enemies can interrupt a mining run. Prepare for the journey instead of treating it as a short walk from the base.
Bring the following:
- A Bone Pickaxe for the copper and tin nodes.
- Food and whatever combat equipment you already rely on for dangerous travel.
- Enough free inventory space to carry two separate ore stacks.
- Materials for a shelter and bed if you want a nearby fallback point.
- Lodestone and Law Rune supplies only if you have already unlocked that travel setup.
A remote shelter can reduce the cost of a failed trip. A Lodestone connection can shorten repeated runs even further, but it is optional and should not delay the first bronze batch if you can travel safely without it. If you use Lodestones, place the remote point where it meaningfully reduces the walk rather than automatically dropping it at the outer edge of the region.
Plan around equal ore totals. A large copper haul is not useful for bronze if you return with too little tin. Check both stacks before leaving the area and continue looking for the resource that is behind.
Mine Copper and Tin in the Fractured Plains
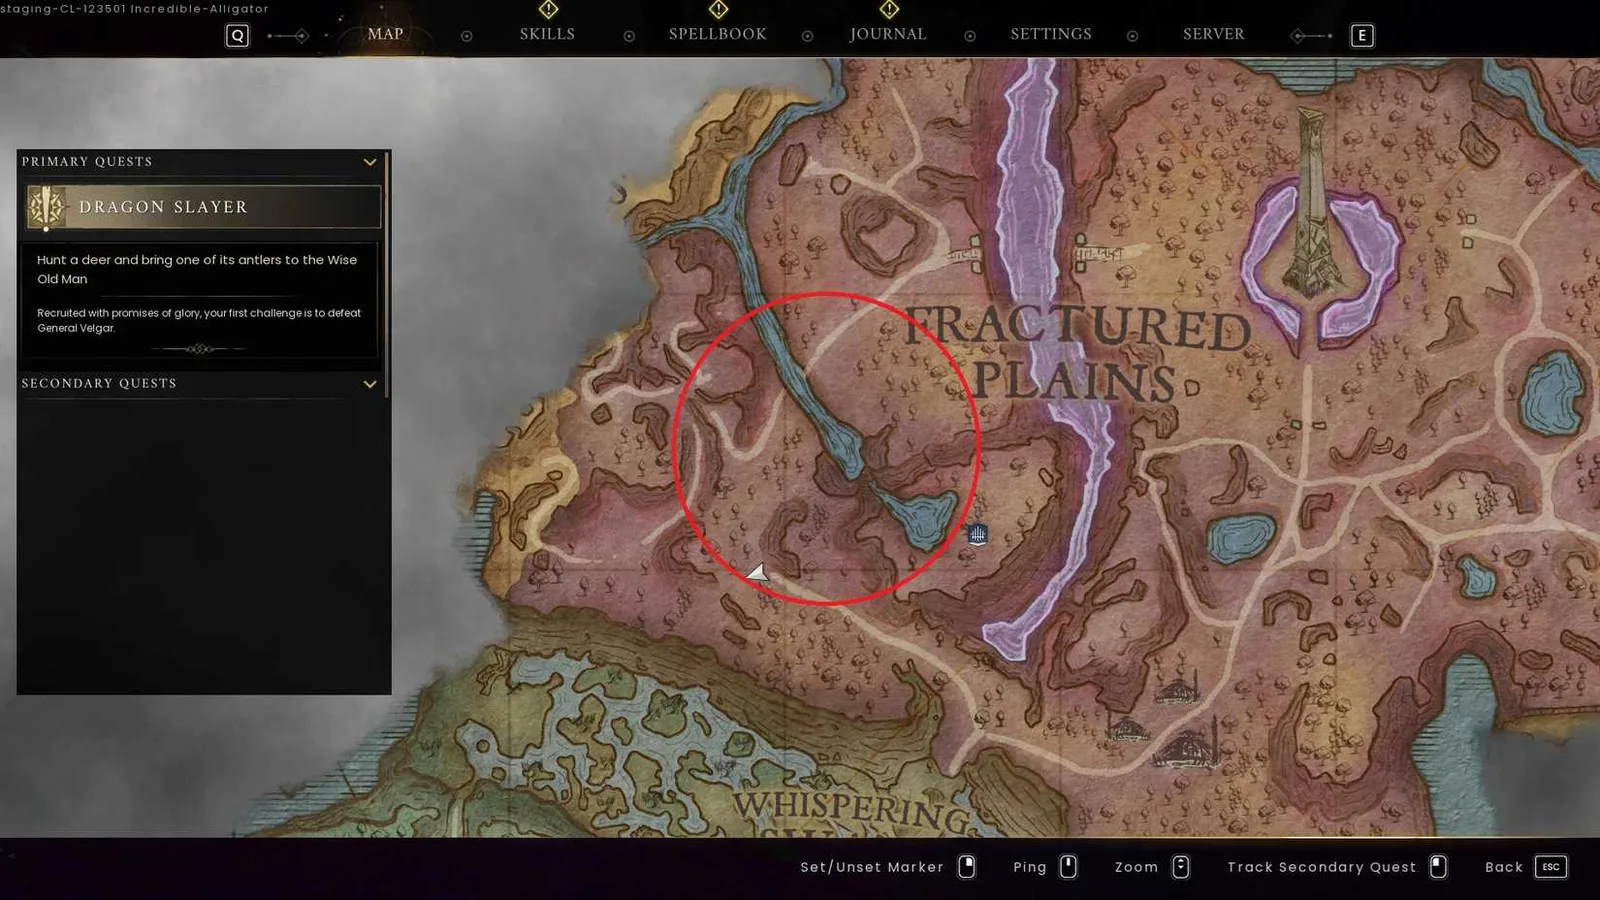
The Fractured Plains route showing where to find the copper and tin needed for bronze.
Copper and tin can both be found in the Fractured Plains. The available route descriptions point to rocky ridges, cliff faces, and the western river area as useful places to inspect. Tin can be less obvious on an initial pass, so do not end the run after finding the first visible copper deposits.
Use this simple collection loop:
- Enter the Fractured Plains with the Bone Pickaxe in your inventory.
- Follow exposed rock, ridges, and cliff edges rather than searching open grass alone.
- Mine both Copper Ore and Tin Ore whenever you find them.
- Mark productive clusters on the map so the next run does not repeat the entire search.
- Compare the two ore totals before heading home.
- Continue until each total is divisible into complete groups of three.
Ore deposits vary in size, so one small tin node does not prove that the entire region lacks tin. Community reports disagree about which ore feels scarcer, but the recipe itself is unambiguous: every smelting batch needs three of each. Let the inventory totals guide the route instead of trying to reproduce a real-world alloy ratio.
Enemies are another reason to mark deposits. A map pin lets you return directly to a useful cluster after upgrading equipment or changing your travel setup. If a fight is consuming the food and durability reserved for mining, disengage when possible and approach the nodes from another direction. The goal of the trip is a balanced load of ore, not clearing every enemy in the region.
Nearby sheep can also be useful because bronze weapons and armour often require Wool Thread in addition to bars. Gathering Fleece while already in the region may prevent another material trip, but copper and tin remain the priority. Do not fill the inventory with secondary materials before securing enough ore for the intended bronze craft.
Calculate the Ore You Need
Use complete smelting batches when planning a target. Partial ingredients cannot produce a partial bar.
| Bronze target | Furnace batches | Copper Ore | Tin Ore |
|---|---|---|---|
| 2 bars | 1 | 3 | 3 |
| 4 bars | 2 | 6 | 6 |
| 6 bars | 3 | 9 | 9 |
| 8 bars | 4 | 12 | 12 |
| 10 bars | 5 | 15 | 15 |
| 12 bars | 6 | 18 | 18 |
A 6-bar target is enough bronze for one of the key bronze-era benches, although each bench also needs its other listed materials. An 8-bar target covers a Bronze Sword or Bronze Shield. A 10-bar target covers a Bronze Greatsword or Bronze Platebody. Recipes with odd bar costs create leftovers because the Furnace always produces bars in pairs.
For several crafts, add their bar costs first and then round the target up to the next even number. A Bronze Logging Axe and Bronze Pickaxe cost 5 bars each, so together they require exactly 10 bars: five Furnace batches, 15 Copper Ore, and 15 Tin Ore.
Smelt Bronze Bars at a Furnace
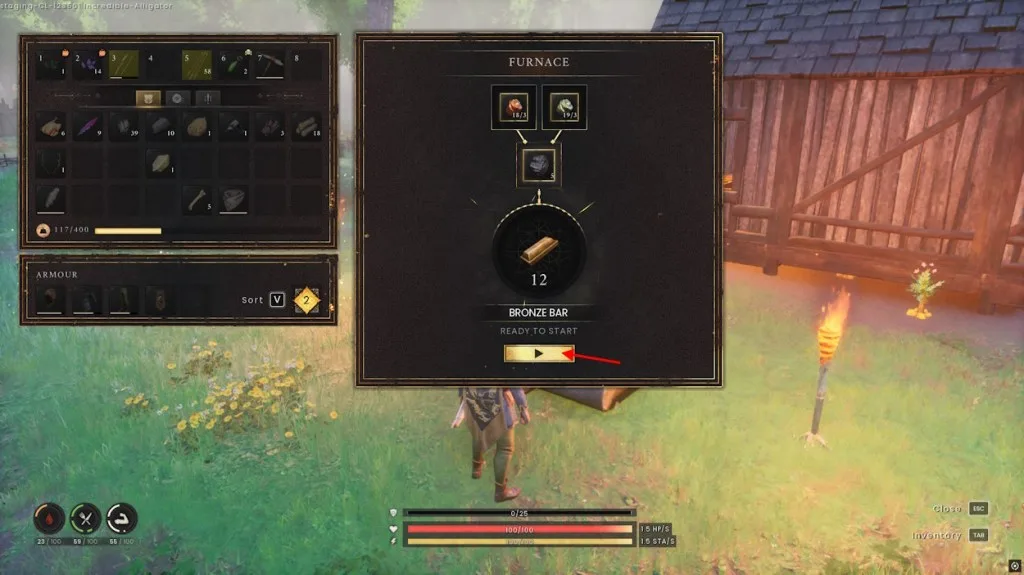
The Furnace interface shows Copper, Tin, and Charcoal being prepared for bronze-bar smelting.
Once you have both ores, use a Furnace to create the alloy:
- Open the Furnace.
- Supply 3 Copper Ore.
- Supply 3 Tin Ore.
- Start the Bronze Bar recipe.
- Collect the 2 completed Bronze Bars into your inventory.
Collecting the output matters because receiving a Bronze Bar in your inventory unlocks the next set of build options. If you started with enough materials for several batches, process them in sequence while keeping the input totals balanced.
The current structured recipe lists copper and tin as the consumed materials. Some older guides describe additional fuel steps or use obsolete crafting-station names. Follow the recipe shown by the current game interface instead of forcing an old workflow onto the 1.0 crafting system.
There are two other documented processing routes, but neither is the normal first-bronze path:
- A Furnace can turn 9 Bronze Salvage Piles into 1 Bronze Bar.
- A Blast Furnace can turn 10 Bronze Leaves into 1 Bronze Bar.
Bronze Leaves can also be made at a Jeweler's Bench at a rate of 10 leaves from one bar, so the Blast Furnace recipe can recover that converted material. For ordinary early progression, mining copper and tin is the direct and predictable method. Bronze Bars are not sold in shops.
Unlock Bronze Crafting Stations
Receiving your first Bronze Bar unlocks these station recipes:
- Loom
- Sawmill
- Blacksmith's Bench
- Armour Bench
- Mystic Forge
An unlock is not a free structure. You must still supply every material required by the chosen build recipe. Two especially important stations have matching bronze costs:
| Station | Required materials |
|---|---|
| Blacksmith's Bench | 6 Bronze Bars, 20 Ash Logs, 8 Coarse Thread, 1 Vault Core |
| Armour Bench | 6 Bronze Bars, 20 Ash Logs, 8 Coarse Thread, 1 Vault Core |
The Blacksmith's Bench makes bronze weapons and tools. The Armour Bench makes bronze armour. If your immediate goal is better gathering equipment, the Blacksmith's Bench is the relevant first build. If survivability is the larger problem and you already have suitable tools and weapons, the Armour Bench may deserve priority.
Building both benches requires 12 Bronze Bars in total, which means six smelting batches and 18 of each ore. It also doubles the non-metal costs to 40 Ash Logs, 16 Coarse Thread, and 2 Vault Cores. Confirm those supporting materials before committing to a large ore run.
Current recipes use the name Blacksmith's Bench. Older bronze guides may tell you to build a Smithing Forge or Smithing Anvil, but the Smithing Anvil was removed and the affected items now use the Blacksmith's Bench. If you cannot find the older station name in the build menu, this naming change is the likely reason.
Choose Your First Bronze Crafts
The best first craft depends on the bottleneck you are trying to remove. Bronze supports gathering tools, melee weapons, shields, armour, ammunition, workstations, and several utility structures. Spending bars on everything at once creates unnecessary return trips, so choose one concrete outcome first.
| Craft | Bronze Bars | Other materials | Practical role |
|---|---|---|---|
| Bronze Logging Axe | 5 | 4 Ash Logs, 2 Coarse Thread | Logging upgrade |
| Bronze Pickaxe | 5 | 4 Oak Logs, 2 Leather | Mining upgrade |
| Bronze Sword | 8 | 4 Leather, 1 Wool Thread | One-handed melee weapon |
| Bronze Shield | 8 | 4 Leather | Defensive off-hand craft |
| Bronze Greatsword | 10 | 4 Leather, 2 Wool Thread | Two-handed melee option |
| Bronze Platebody | 10 | 4 Hard Leather, 2 Wool Thread | Body armour |
| Bronze Platelegs | 6 | 2 Hard Leather, 4 Wool Thread | Leg armour |
| Bronze Helmet | 4 | 2 Hard Leather, 1 Wool Thread | Head armour |
Prioritize tools when gathering is blocked
The Bronze Logging Axe and Bronze Pickaxe each cost 5 bars. Craft the tool tied to the resource that is currently stopping progression. Making both costs 10 bars and uses the Furnace output cleanly with no leftover bar.
Remember that the tool recipes also require wood, thread, or leather. Bronze alone does not complete them. Check the Blacksmith's Bench recipe before leaving storage so you do not discover a missing secondary material after smelting the bars.
Prioritize a weapon when combat blocks the route
The Bronze Sword is a power-level-3 one-handed melee weapon. It deals slash damage, supports blocking, and has a forward-stab special attack with useful reach. Its recipe costs 8 Bronze Bars, 4 Leather, and 1 Wool Thread at the Blacksmith's Bench.
The Bronze Greatsword costs 10 bars, while the Bronze Shield costs 8. These are different commitments and should not be treated as automatic additions to the first mining trip. Choose the combat setup you actually plan to use before calculating the ore target.
Prioritize armour when incoming damage is the problem
A Bronze Platebody costs 10 bars, Bronze Platelegs cost 6, and either listed bronze headpiece costs 4. A platebody, platelegs, and one 4-bar helmet therefore consume 20 Bronze Bars before counting the Hard Leather and Wool Thread requirements.
That full metal commitment is much larger than one tool or weapon. If only one equipment slot is causing trouble, crafting that piece first can be more efficient than delaying every upgrade until a complete set is affordable. Detailed armour comparisons belong to the dedicated armour guide; for bronze planning, the essential step is to total the bar costs before mining.
Fix Common Bronze Progression Problems
No bronze nodes appear on the map
Look for Copper Ore and Tin Ore, not a standard Bronze Ore deposit. Bronze is produced at the Furnace after both ores are gathered.
Copper is plentiful but tin runs out
The Furnace recipe consumes equal quantities. Stop adding copper to the route once it is far ahead and spend the remaining inventory space searching ridges, cliff faces, and previously marked tin clusters. Smelting cannot use the surplus copper without matching tin.
The Furnace produces fewer bars than expected
One batch uses 3 copper and 3 tin to create 2 bars. Six total pieces of ore do not become six bars. Calculate by complete batches and remember that every output arrives in pairs.
The new stations remain unavailable
Make sure the completed Bronze Bar has been received in your inventory. The first bar unlocks the Loom, Sawmill, Blacksmith's Bench, Armour Bench, and Mystic Forge recipes; it does not automatically construct them.
The guide says to use a Smithing Anvil
Use the Blacksmith's Bench for current bronze weapon and tool recipes. The Smithing Anvil was removed, so instructions built around that older station no longer match the current crafting layout.
A bronze recipe is still greyed out
Check every secondary ingredient, not only the bars. Bronze equipment can also require Ash Logs, Oak Logs, Leather, Hard Leather, Coarse Thread, or Wool Thread. Stations themselves may require a Vault Core and additional construction materials.
A Clean First-Bronze Route
For the shortest practical progression path, decide on one first craft, convert its bar cost into complete Furnace batches, and gather equal copper and tin totals. A player targeting the Blacksmith's Bench needs 6 bars, so the ore portion is three batches: 9 Copper Ore and 9 Tin Ore. A player targeting both 5-bar tools needs 10 bars, so the ore portion is five batches: 15 of each ore.
Travel to the Fractured Plains with a Bone Pickaxe and enough empty inventory space. Search rocky terrain for both ores, mark useful clusters, and avoid letting copper crowd tin out of the pack. Return to the Furnace, smelt complete 3-and-3 batches, and collect the bars. Then build the station or item selected before the trip.
That sequence keeps bronze progression focused: choose the outcome, calculate paired batches, gather balanced ores, smelt the bars, and spend them on the bottleneck that matters now.