
Hard Leather is made at a Tannery with a Tanner’s Kit placed nearby. The standard recipe combines 2 Leather and 1 Adhesive to produce 1 Hard Leather. A second recipe converts 4 Hard Leather Scraps into 1 Hard Leather. Both routes require the upgraded Tannery setup; an ordinary one-slot Tannery cannot combine the materials used by the standard recipe.
The main progression condition is the Tanner’s Kit. Smelt your first Bronze Bar to unlock this improvement, build it from 6 Bronze Bars, 8 Coarse Threads, 6 Adhesive, and 18 Ash Planks, and place it close to the Tannery. If Leather and Adhesive are in your inventory but the Hard Leather recipe is still unavailable, the missing or incorrectly placed Tanner’s Kit is the first thing to check.
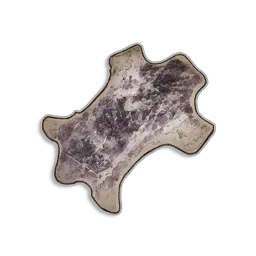
The finished Hard Leather item.
Hard Leather is not sold in shops, so plan to craft it or obtain it from supported loot sources. One piece weighs 0.6 and the current stack limit is 99.
Hard Leather requirements at a glance
| Requirement | What you need |
|---|---|
| Workstation | Tannery |
| Required improvement | Tanner’s Kit placed close to the Tannery |
| Standard recipe | 2 Leather + 1 Adhesive |
| Standard output | 1 Hard Leather |
| Scrap recipe | 4 Hard Leather Scraps |
| Scrap output | 1 Hard Leather |
| Recipe experience | 40 Artisan XP |
| Shop availability | Not sold in shops |
| Stack limit | 99 |
| Weight per piece | 0.6 |
The standard route is the dependable production method when you already have a functioning base. It turns common processed Leather into Hard Leather, but every craft also consumes Adhesive. The scrap route removes the need for Leather and Adhesive at the final step, although it depends on finding four scraps for every finished piece.
How to craft Hard Leather step by step
- Build a regular Tannery. This is the workstation that processes Animal Hide into Leather and later combines Leather with Adhesive.
- Smelt your first Bronze Bar. Doing so unlocks the Tanner’s Kit improvement and also supports the workstation progression needed for its materials.
- Prepare the Tanner’s Kit materials. Collect 6 Bronze Bars, 8 Coarse Threads, 6 Adhesive, and 18 Ash Planks.
- Build the Tanner’s Kit beside the Tannery. It must be close enough to improve that workstation. The visible result is a Tannery with two usable material slots.
- Process Animal Hide into Leather. Use the Tannery’s basic function until you have two pieces of Leather for each Hard Leather you intend to make.
- Produce Adhesive. Put Swamp Tar into a Kiln. You need one Adhesive for every standard Hard Leather craft, in addition to the six used to build the Tanner’s Kit.
- Return to the improved Tannery. Put Leather in one slot and Adhesive in the other.
- Start the recipe. Every 2 Leather and 1 Adhesive produce 1 Hard Leather.
- Collect the output. If you need several pieces for armour or equipment, keep the same two inputs supplied until the planned batch is complete.
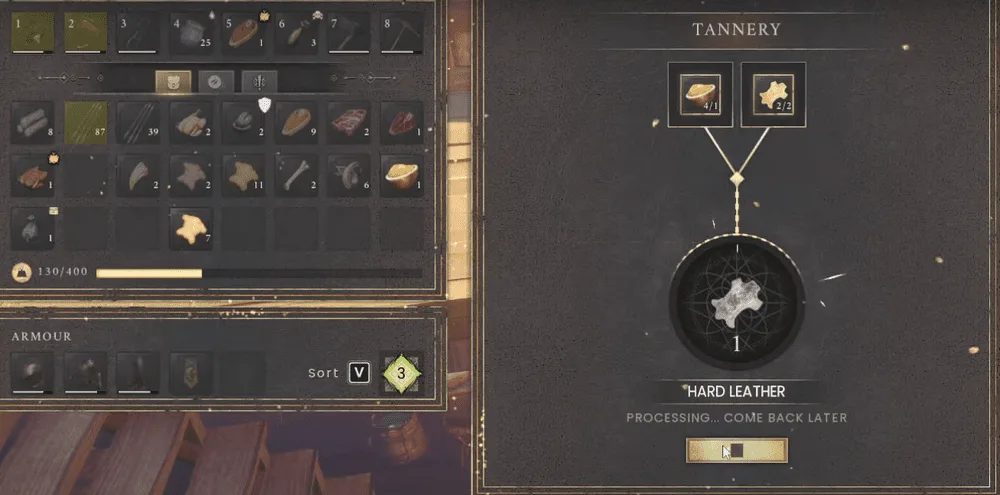
The Tannery interface shows Leather and Adhesive loaded for Hard Leather processing.
The order matters because several ingredients depend on earlier workstation progression. A pile of Leather alone will not reveal a way to harden it at a basic Tannery. Likewise, placing a Tanner’s Kit away from the workstation does not give the Tannery its second input slot. Treat the Tannery and its improvement as one crafting setup.
Get the ingredients for the standard recipe
Make regular Leather
Animal Hide is the raw input for ordinary Leather. Place the hide in a Tannery and process it before attempting the Hard Leather recipe. Hard Leather does not use raw hide directly: the hide must first become Leather, and that processed Leather is then combined with Adhesive.
This two-stage conversion is a common source of confusion. If the interface accepts Animal Hide but will not let you add Adhesive, you are still using the Tannery’s basic recipe or the Tanner’s Kit is not active. Finish the Leather, collect it, and then place that Leather back into the upgraded workstation with Adhesive.
Make Adhesive from Swamp Tar
Adhesive is produced by putting Swamp Tar in a Kiln. Swamp Tar appears as small dark mud-like deposits in the Whispering Swamp. Bring it back to your base and process it in the Kiln before using it in either the Tanner’s Kit or the Hard Leather recipe.
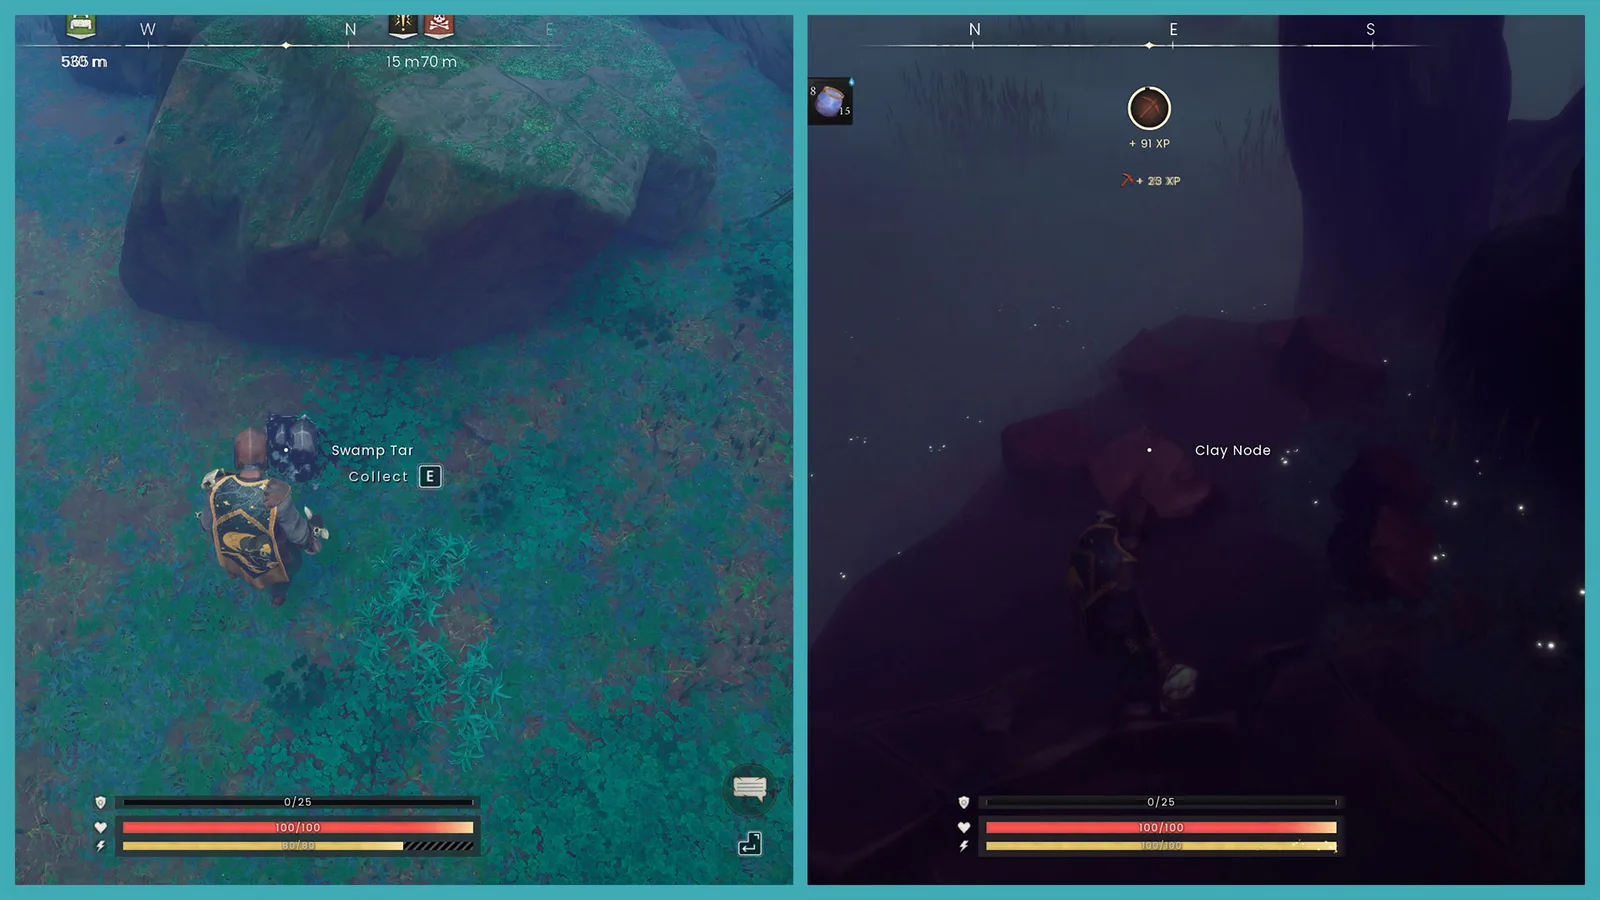
Swamp Tar is collected in the Whispering Swamp before being processed into Adhesive.
Do not count only the Adhesive required by the final recipe if you have not built the Tanner’s Kit. A new setup consumes six Adhesive for the improvement before the first piece of Hard Leather can be made. For example, producing five Hard Leather from scratch requires 11 Adhesive in total: six for the permanent Tanner’s Kit and five for the batch. Once the kit exists, later batches require only one Adhesive per finished piece.
The site has a separate primary page for Adhesive, so the essential point here is the dependency: collect Swamp Tar, process it in the Kiln, reserve six Adhesive for a new Tanner’s Kit, and then reserve one more for every Hard Leather you plan to craft.
Prepare Bronze Bars, Coarse Thread, and Ash Planks
The other Tanner’s Kit ingredients are one-time setup costs:
- 6 Bronze Bars for the improvement itself.
- 8 Coarse Threads made through the thread-processing progression.
- 18 Ash Planks produced from Ash Logs at a Sawmill.
- 6 Adhesive produced from Swamp Tar at a Kiln.
Ash Planks must be processed; ordinary Ash Logs do not replace them in the Tanner’s Kit recipe. The Sawmill becomes available after the first Bronze Bar progression step, so smelting Bronze is the useful starting point when several required build options are still missing.
Calculate materials for a Hard Leather batch
Use the following table for the repeatable recipe after the Tanner’s Kit has already been built.
| Hard Leather wanted | Leather required | Adhesive required | Hard Leather Scraps for the alternative recipe |
|---|---|---|---|
| 1 | 2 | 1 | 4 |
| 5 | 10 | 5 | 20 |
| 10 | 20 | 10 | 40 |
| 20 | 40 | 20 | 80 |
| 24 | 48 | 24 | 96 |
If this is your first batch, add the Tanner’s Kit cost separately. For a target of ten Hard Leather, a completely new setup therefore needs 20 Leather and 16 Adhesive, plus 6 Bronze Bars, 8 Coarse Threads, and 18 Ash Planks. Six of those Adhesive build the kit; the remaining ten are consumed by the ten crafts.
Calculate the finished item you want before processing everything. A complete Hard Leather armour set uses 20 Hard Leather, while some later armour sets use the same amount or more. Planning first prevents you from arriving at an Armour Bench with enough material for a cowl but not the body or chaps.
Choose between crafting, scraps, and loot
The regular Leather-and-Adhesive recipe is best for controlled production because each output has a fixed cost and all processing happens at your base. Use the scrap recipe when exploration has already supplied enough Hard Leather Scraps. Four scraps replace both of the normal final inputs, but the conversion still takes place at the improved Tannery.
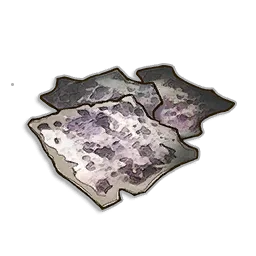
Hard Leather Scraps are the alternative recipe input.
Finished Hard Leather can also appear as loot. Supported sources include the following:
| Source | Hard Leather quantity | Recorded availability |
|---|---|---|
| Zogre | 4–8 | Always |
| Ulgo the Zogre | 4–8 | Always |
| Doric’s Smithing Supplies | 3–5 | Always |
| Doric’s Superior Smithing Supplies | 3–6 | Always |
| Leather Salvage | 1–2 | 20/100 |
| Chest in Umbral Sands | 3–4 | Multiple recorded loot entries |
| Chest in Dowdun Reach | 1–2 | Multiple recorded loot entries |
Abyssal Demons also have recorded Hard Leather drops of five pieces, but the supplied loot data contains several separate entries with different probabilities. Treat that as a combat drop rather than a single guaranteed rate.
Loot is useful when it happens to overlap with your current objective, but crafting remains easier to budget. Hard Leather is not available from shops, so there is no merchant shortcut if your armour recipe is missing several pieces.
What to craft with Hard Leather
Hard Leather is used across ranged armour, metal armour, weapons, shields, mage equipment, and the next leather-processing tier. The most immediate dedicated set is Hard Leather armour:
| Item | Hard Leather | Other materials |
|---|---|---|
| Hard Leather Cowl | 4 | 2 Wool Thread, 1 Bronze Bar |
| Hard Leather Body | 10 | 4 Wool Thread, 2 Bronze Bars |
| Hard Leather Chaps | 6 | 4 Wool Thread, 2 Bronze Bars |
| Complete set | 20 | 10 Wool Thread, 5 Bronze Bars |
The Hard Leather Body is power level 3 ranged armour. The three-piece set rewards ranged and stealth play: one equipped piece grants +40 Stealth Speed, two pieces reduce Ranged Attack Stamina Cost by 33%, and all three provide +25% Weak Point Damage.
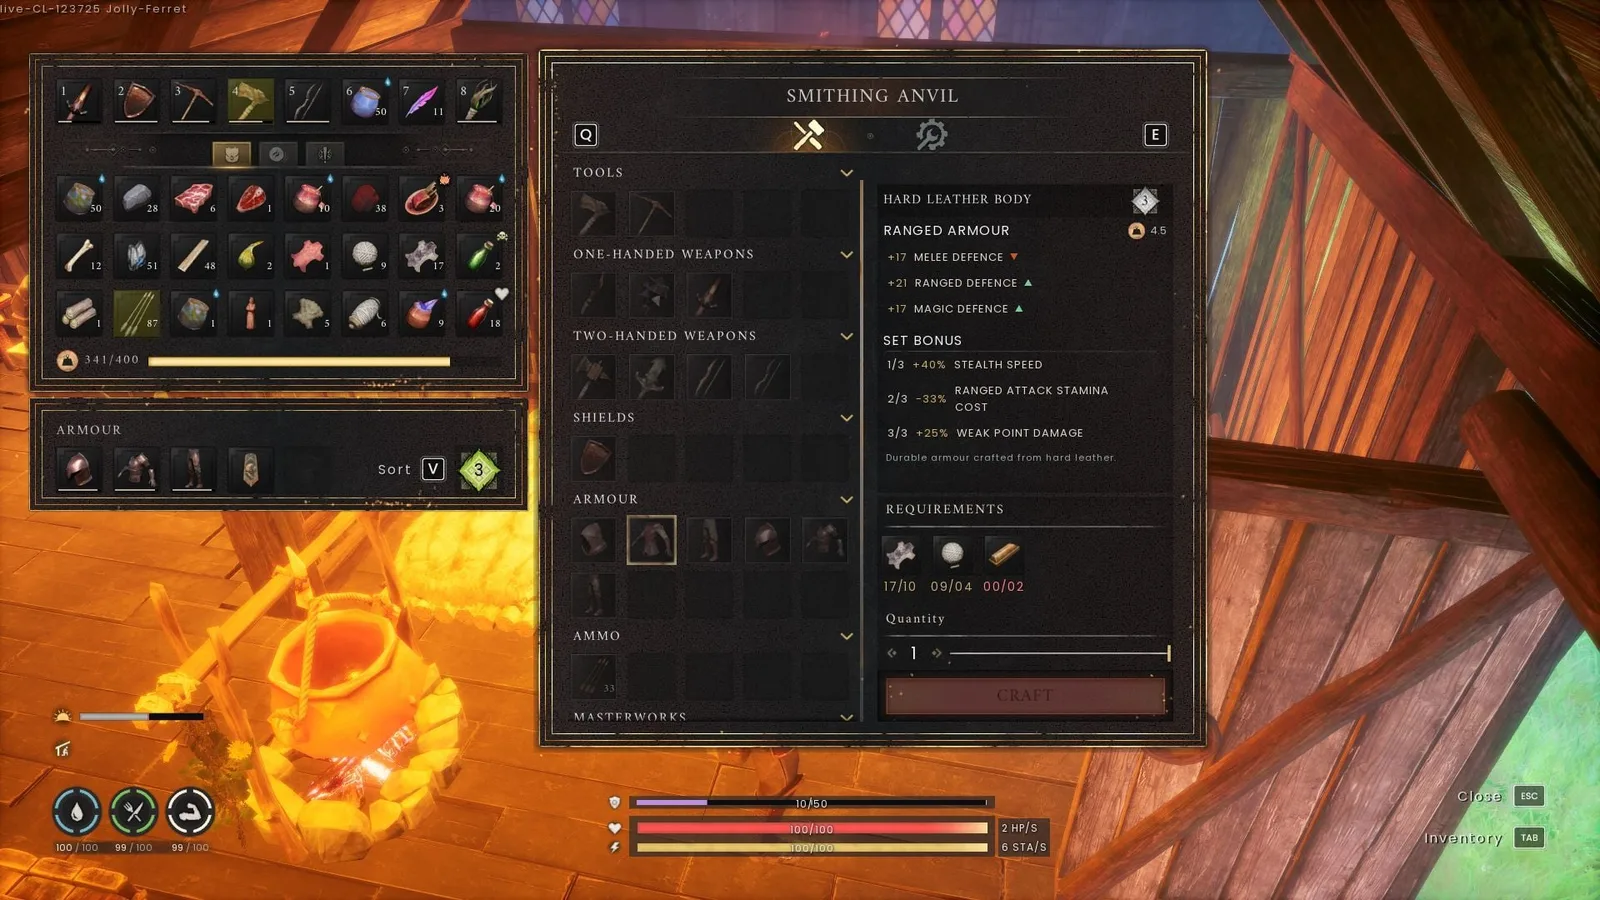
The armour interface identifies the Hard Leather Body and shows the related armour pieces.
Other useful production targets show why keeping a reserve is worthwhile:
| Crafting target | Hard Leather required |
|---|---|
| Bronze Helmet | 2 |
| Bronze Med Helm | 2 |
| Bronze Platebody | 4 |
| Bronze Platelegs | 2 |
| Full Bronze armour group listed above | 10 |
| Studded Leather Cowl | 4 |
| Studded Leather Body | 10 |
| Studded Leather Chaps | 6 |
| Full Studded Leather set | 20 |
| Wild Archer Cowl | 4 |
| Wild Archer Body | 12 |
| Wild Archer Chaps | 8 |
| Full Wild Archer set | 24 |
| Iron Pickaxe | 2 |
| Iron Greatsword | 4 |
| Iron Shield | 4 |
| Anti-Dragon Shield | 4 |
| Draconic Leather | 3 per piece |
Hard Leather is therefore not just an ingredient for its namesake armour. It remains part of later equipment recipes and becomes an input for Draconic Leather, where 3 Hard Leather and 1 Dragon Blood produce 1 Draconic Leather at a Tannery. Avoid converting your entire stock if you still need immediate armour, tools, or shields.
Fix a missing Hard Leather recipe
If you have the ingredients but cannot start crafting, check the setup in this order:
- Confirm that you are using Leather, not Animal Hide. Hide must be processed into ordinary Leather first.
- Check for the Tanner’s Kit. A basic Tannery has only one material slot and cannot run the standard two-input recipe.
- Check the kit’s placement. It must be built close to the Tannery it is intended to improve.
- Look for two active slots. The upgraded interface must accept Leather and Adhesive together.
- Confirm the quantities. One craft needs 2 Leather and 1 Adhesive; one piece of each is insufficient.
- Use the correct workstation. Adhesive is made in the Kiln, but Hard Leather itself is made in the Tannery.
- Check whether Bronze progression has been completed. Smelting the first Bronze Bar unlocks the Tanner’s Kit improvement.
- For the alternate recipe, bring four scraps. Fewer than 4 Hard Leather Scraps cannot produce one finished piece.
The most reliable visual test is the number of slots. If the Tannery still exposes only its basic single-input operation, solve the Tanner’s Kit problem before gathering more Leather. Once two slots are active, place the processed Leather and Adhesive together and the Hard Leather output should become available.